More and more of our projects include a stipulation from the client that any web sites must work on the tablet devices of senior management. Up until recently that was exclusively iPads, but we are now seeing more Android devices out there. I wanted to find a straightforward way for us to test on such devices, preferably without needing to build up a collection of expensive physical kit.
I read with interest Ben Armstrong’s post about running Android 2.2 (Froyo) in a VM using a build from the Android x86 project. I started my journey by replicating his steps, so I won’t document any of that here, other than to note that the generic x86 build you need is now a deprecated one, so I had to hunt a little to find what I needed.
Creating the VM was a doddle. However, once I’d got things up and running I hit a snag: The sites I needed to test were hosted on SharePoint and required authentication. The web browser on the Android 2.2 build steadfastly refused to present a logon dialog for any sites. I could rework my test sites with anonymous access or forms-authentication but that didn’t fill me with enthusiasm. I wondered, then, if a later Android version might be my salvation.
That in itself led to a long time spent digging around the corners of the internet: The Android x86 project has a number of Ice Cream Sandwich builds but all are targetted at various types of hardware device and whilst all had support for wifi, none had support for ethernet. Since I can’t present a wifi device within the Hyper-V VM I had to look elsewhere.
The build I finally used was one I found at tabletsx86.org – an Android 4 build with experimental ethernet support.
I ran through a number of installations as I edged my way through the different options each time I found that a choice I’d made prevented me from making some essential tweak. To save you all the effort, I’ve documented the steps here. Since I was a complete Android novice I’ve taken the approach of showing screenshots of every step for other novices like myself.
Step 1: Getting things installed
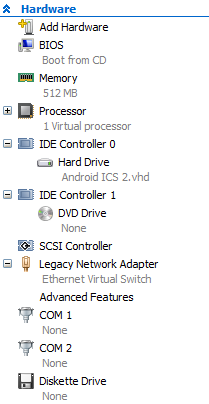
The Virtual Machine we need to create doesn’t have to be powerful. However, we are running an OS that is not Hyper-V aware, so we can’t just go with the defaults.
I created a machine with 512Mb of RAM and a single processor. I started with a 16Gb virtual disk as the hard drive but after a few passes I increased that to 32 to give me some headroom should I want to install apps later. The important step, however, is that you need to add a Legacy Network Adapter and remove the standard virtual adapter that Hyper-V will add.
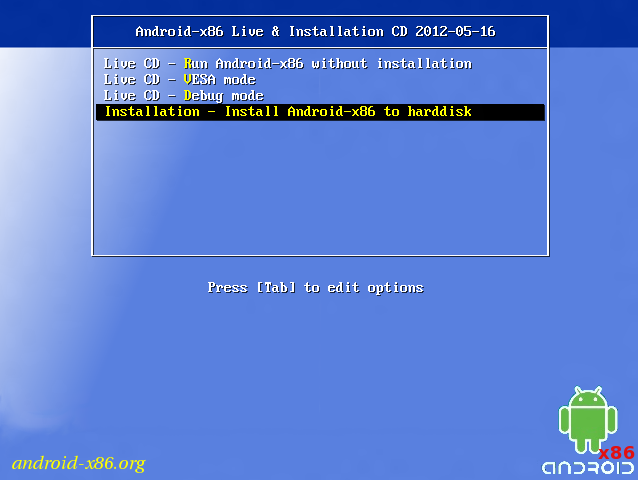
Once you’ve got your VM built, insert the ISO for the Android 4 build into the DVD drive and boot the machine.
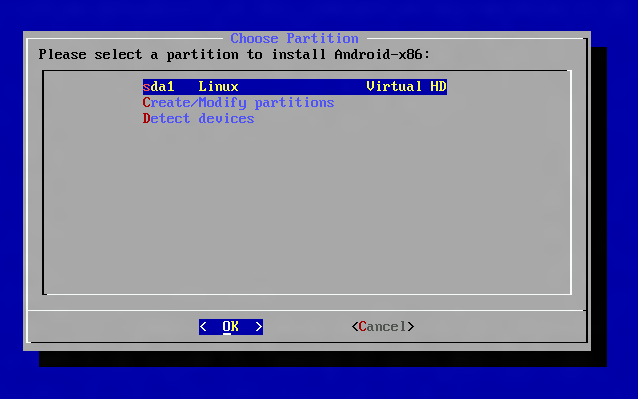
Select the option to install Android to the hard disk of the machine.
On the next screen choose Create/Modify partitions
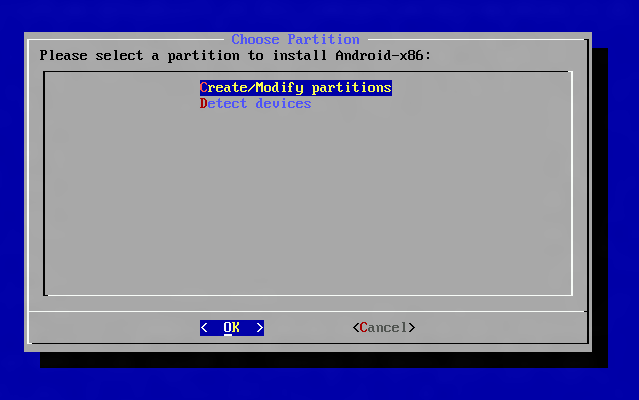
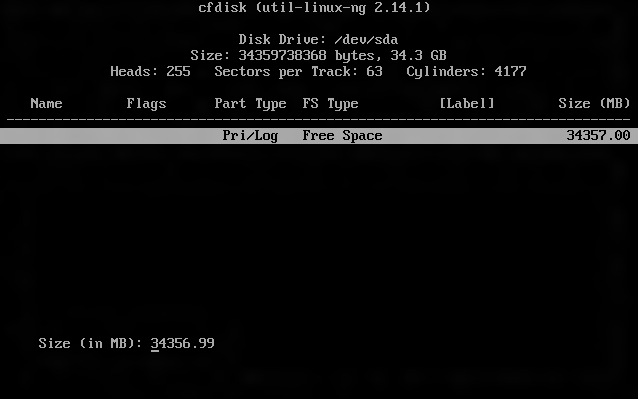
In the partition editor, left and right cursor keys will move between the menu items; enter will select. Choose New to create a new partition.

You want to create a new primary partition
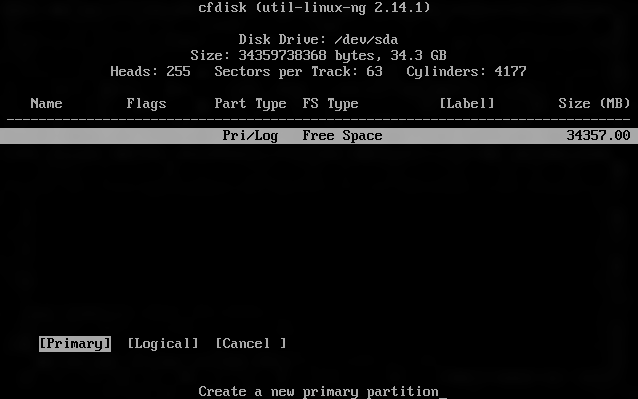
The utility defaults to the full size of the disk. Simply hit enter to confirm that.
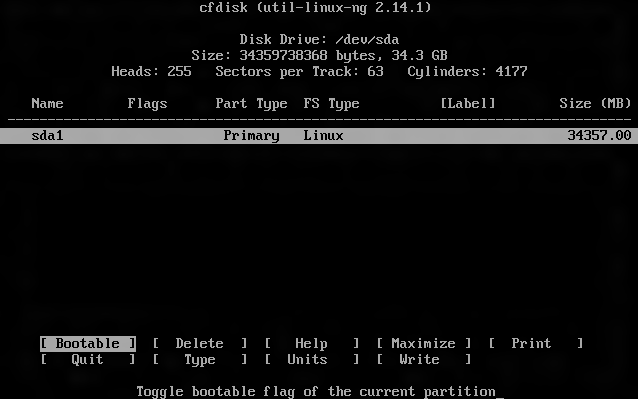
Now we have our partition we need to mark it as bootable.
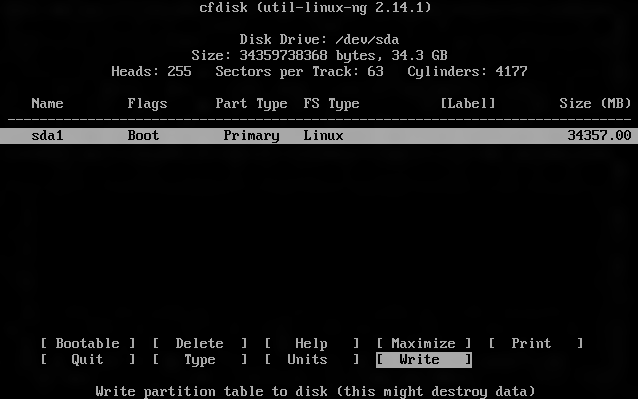
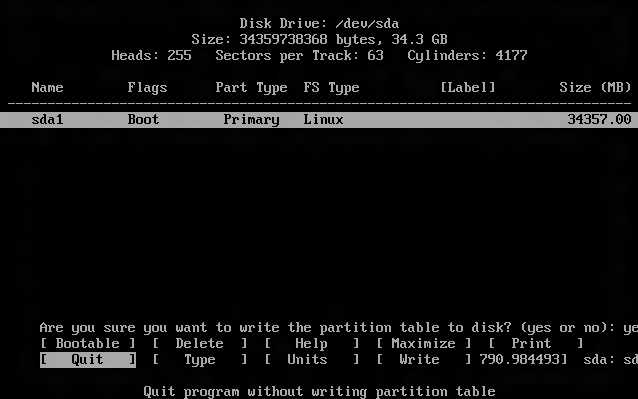
And finally we need to write the changes out to disk.
Now we have our partition we can exit the utility to continue the installation.
The installer will now show our new partition and allow us to select it as the target for the installation.
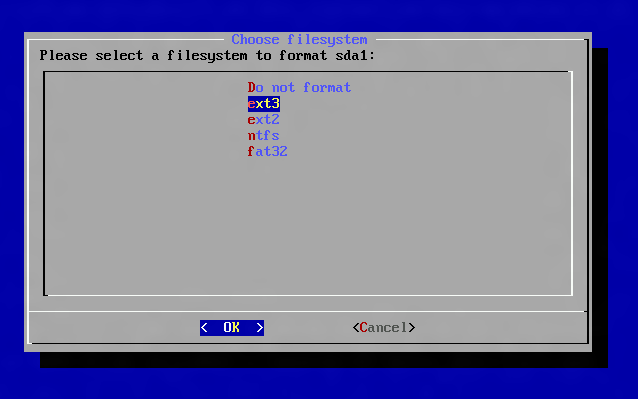
We then need to choose what format to use for the installation. I used ext3. I did try NTFS once, thinking that I could easily transfer files onto the system, but when I attached the VHD windows failed to recognise the file system, so I went back to Ext3, figuring I’d simply transfer stuff over the network.
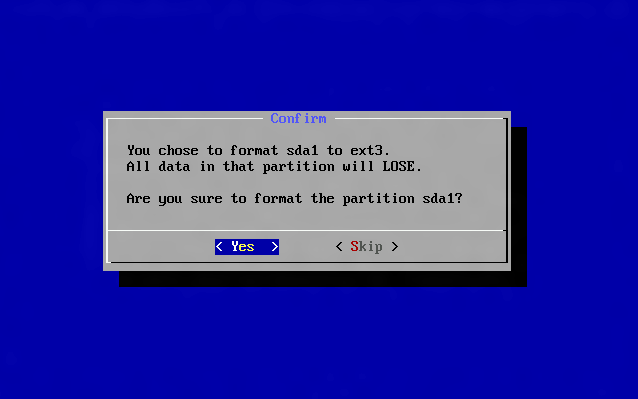
Unsurprisingly, the installer asks for confirmation of the format.
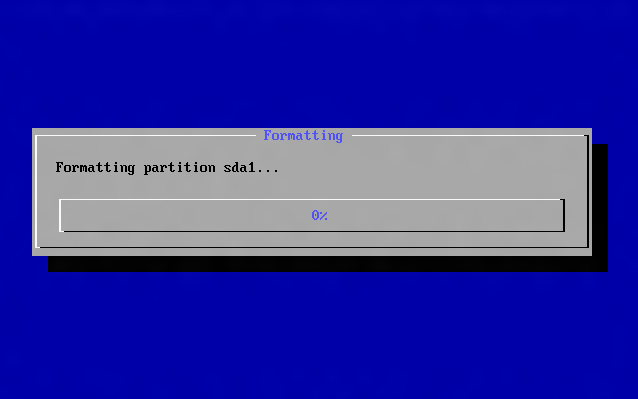
Then it shows progress as it formats.
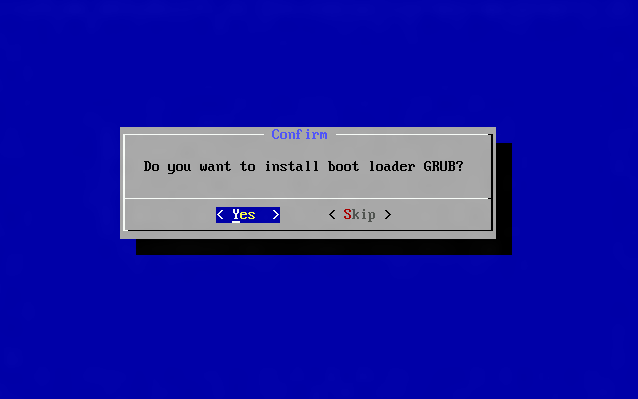
Next you need to install the Grub bootloader. Honestly, I’ve not tried without this, but I modify the bootloader options later so unless you want to plough your own furrow, install Grub.
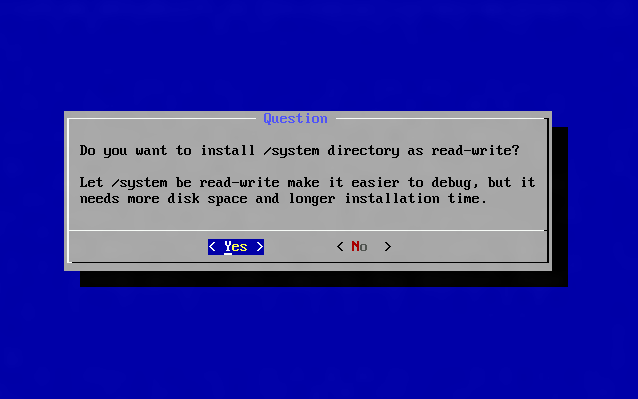
The default option at the next step is to install the system directory as read only. I discovered very quickly that some of the things I might need to fiddle with are in that system directory so I’ve chosen to make it writable.
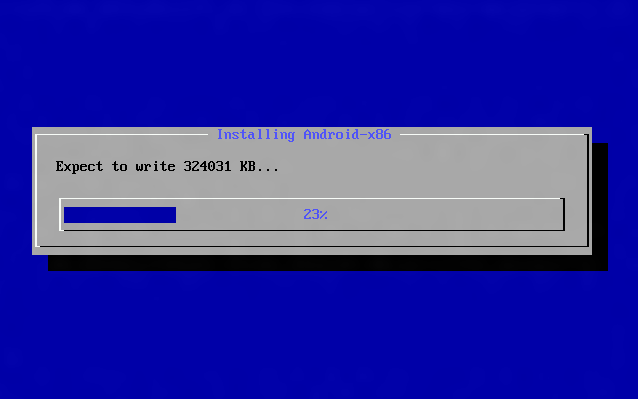
Now the installation occurs.
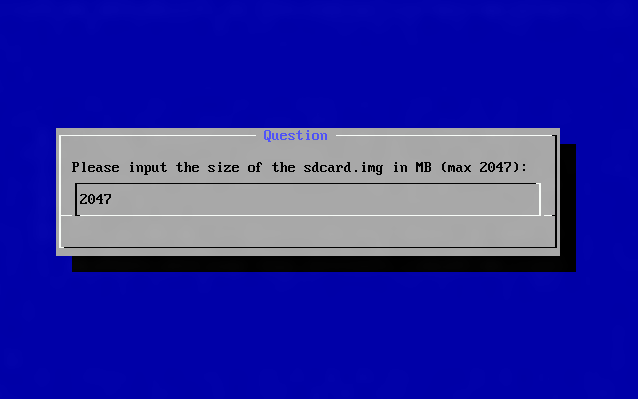
Once the installation is complete you should choose to create a fake SD card. I learned the hard way that if you don’t, saving stuff in your Android web browser won’t work.
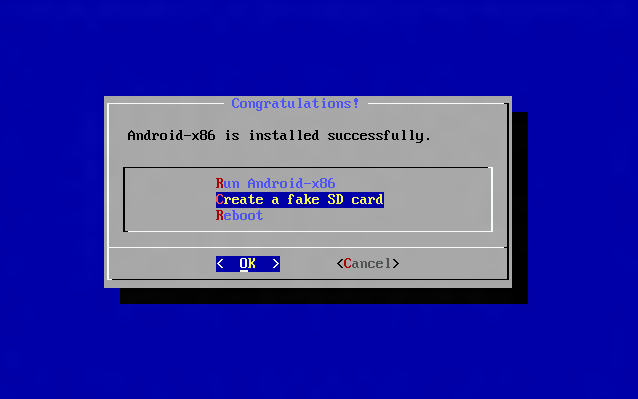
Sadly the largest size we can create is 2Gb, which conveniently is the default.
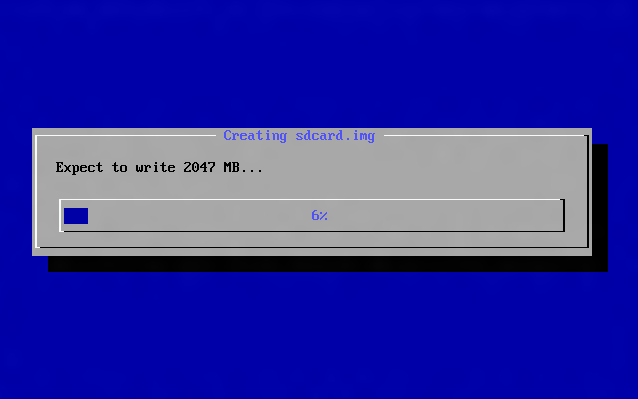
Once again we get a progress bar whilst the SD card image is created.
Now we’re all done and we get the option to reboot. Note that you can’t eject the installation media yet – it’s locked, so you’ll have to reboot.
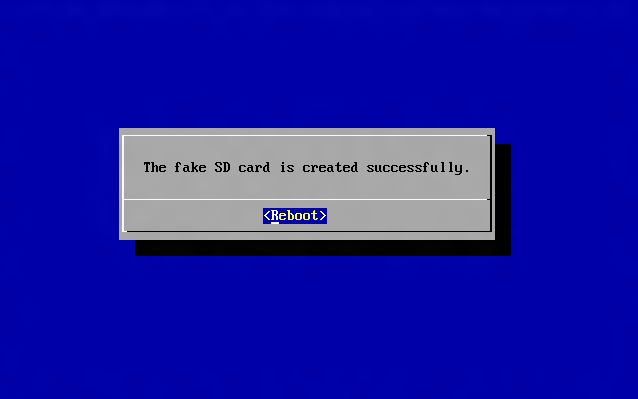
When the VM reboots you’ll be back at the first screen, allowing to choose to install or run the live CD. Turn the VM off so you can eject the media.
At this point the installation is done. You have a shiny new Android VM running Ice Cream Sandwich.
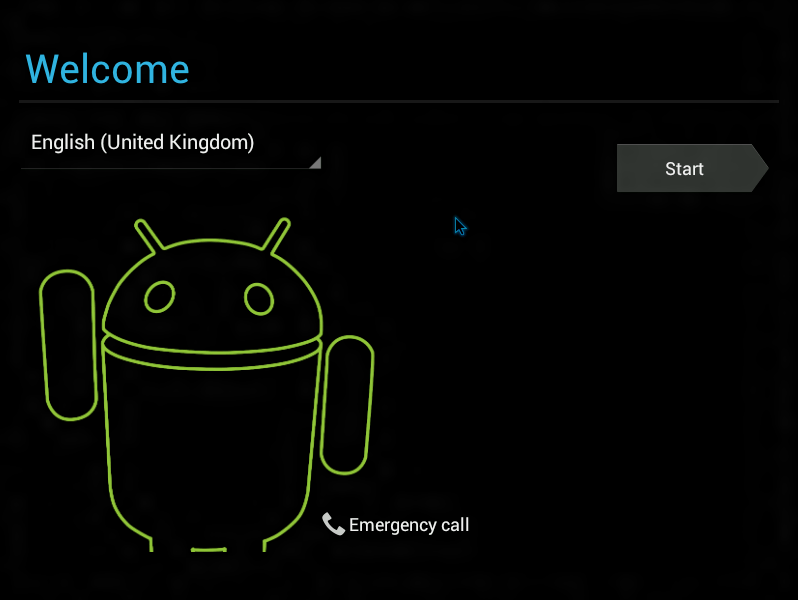
Step 2: The Android wizard
This isn’t difficult at all, other then you need to remember that when you click on the VM to capture the mouse, it’s really emulating your finger. That means that you need to click and drag in drop down menus. I also discovered that the right mouse button seems to act as the hardware back button. Clicking the mouse is equivalent to tapping with your finger.
I set the language to UK English as my first step.
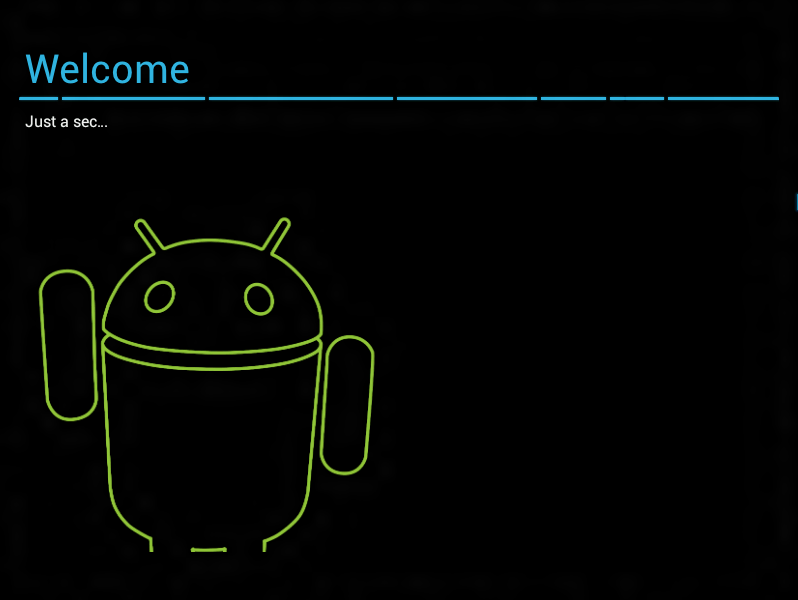
Then the wizard will burble for a little while.
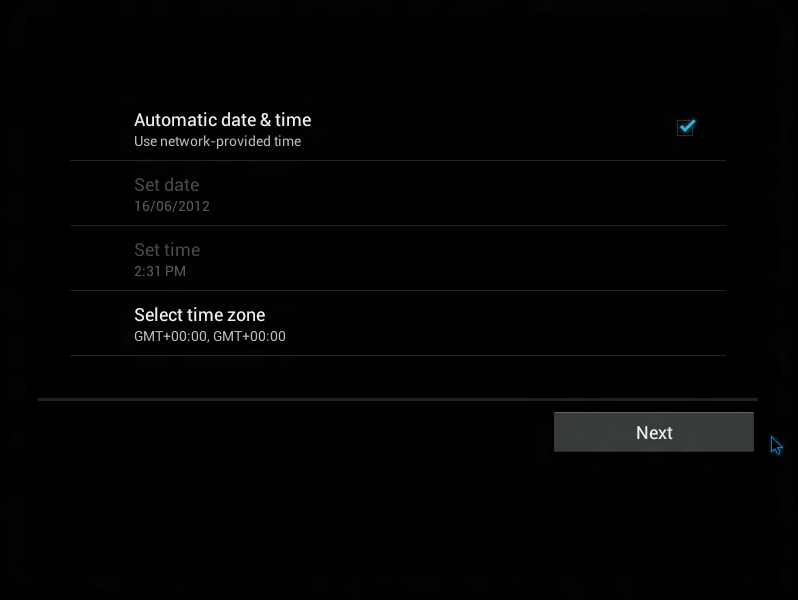
I chose to automatically set the time. Think grey outlines of check boxes are hard to see when they are on a black background!
The next step allows you to use your Google account to keep settings an stuff. I’m building a VM that will be generic and used by lots of people so I skip this one.

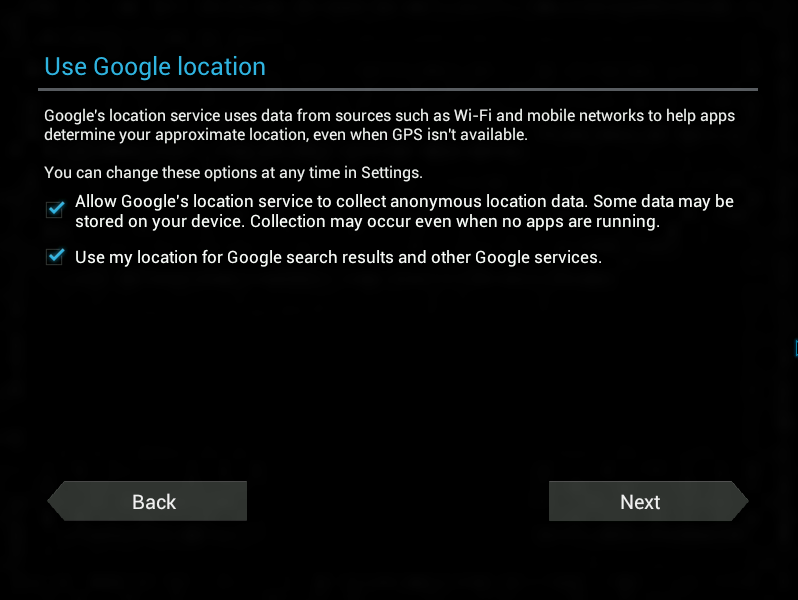
I am happy to use location services though – we want to use this thing for testing, after all.
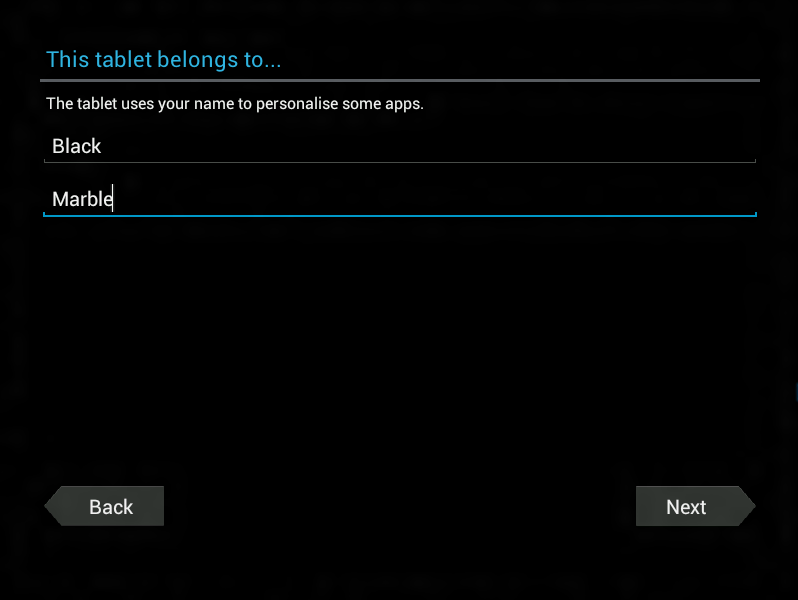
Again, because this is a build for lots of users I’ve put the company in as the owner name. Note that even though we chose United Kingdom as the location, the keyboard setting is for a US keyboard.
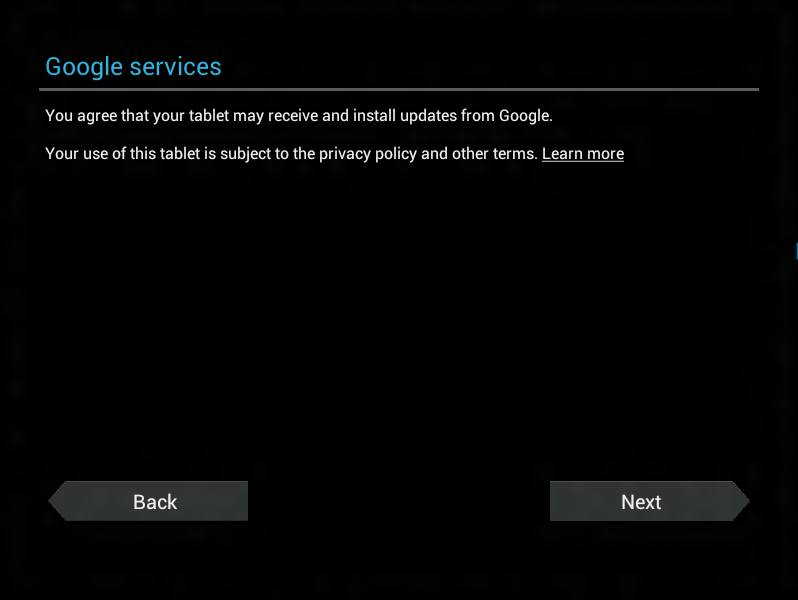
Next we get an obligatory screen where we agree to stuff…
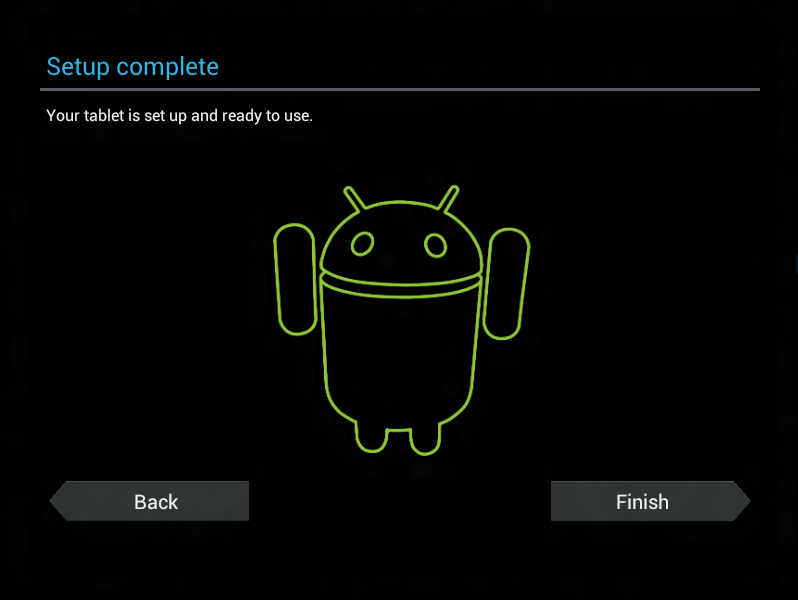
…and we’re done.
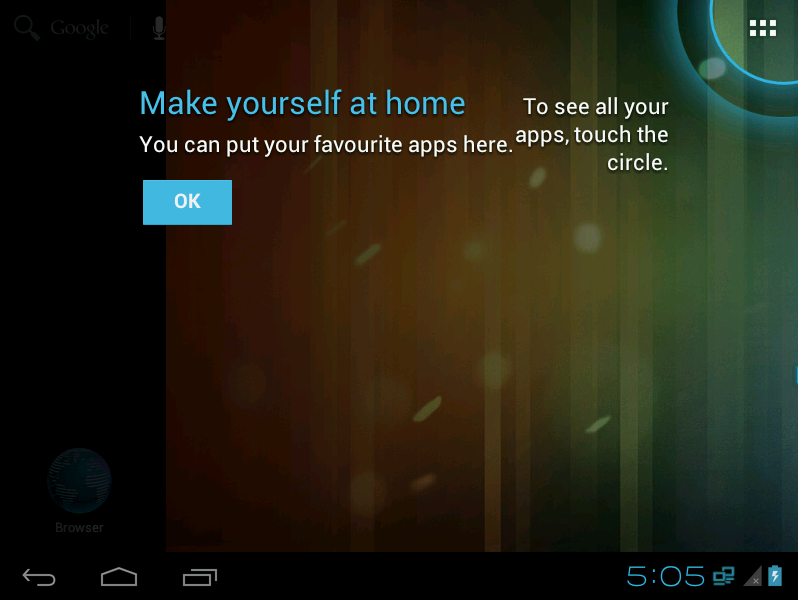
The system helps you through how to use it. The import bits are the icons at the bottom. The upward pointing outline of an arrow in the middle brings you back to the home screen.
A handy tip
This thing feels a lot like Linux to me. Conveniently, pressing alt+f1 will switch to a console screen. Alt+left arrow and alt+right arrow will switch between consoles and the graphical UI.
Inside the console you can use familiar tools like ping and nslookup. It’s not a full-fat linux box, mind you. The two commands I find myself using most in the console are reboot and halt. Odd that there’s no way to cleanly shutdown – no shutdown command or even an old school init 0!
A couple of minor hiccups
Having got my VM up and running and gone through the startup wizard in Android there were a few things not quite right. First of all the screen resolution was too low at only 800x600. Step forward my very rusty Linux experience and my much less rusty internet research expertise!
More worryingly, when I boot the machine it doesn’t always pick up the correct DNS settings. Research showed that to be much more interesting. Strangely, things worked at home but not in the office. Research showed that it was to do with the DHCP responses being different on the two networks: The office network was not responding to the request for DHCP option 119 – domain suffix search order. Fixing that solved the problem (but that’s another can of worms and I’ll write up a separate post about that one!).
Step 3: Setting the screen resolution
This one turned out to be quite easy, although it involves using Vi, which is a text editor whose arcane commands I have very limited knowledge of.
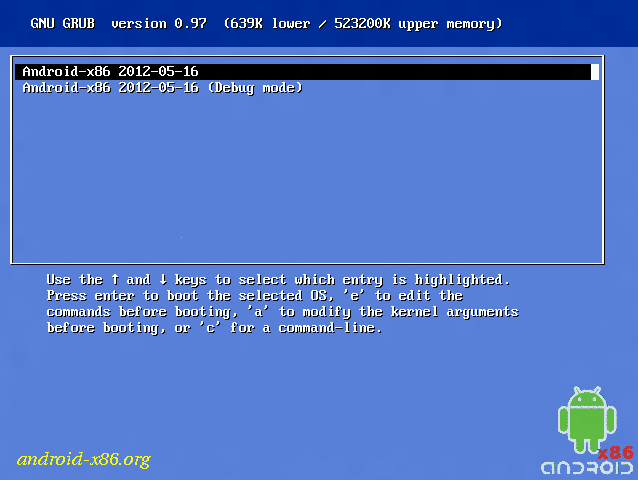
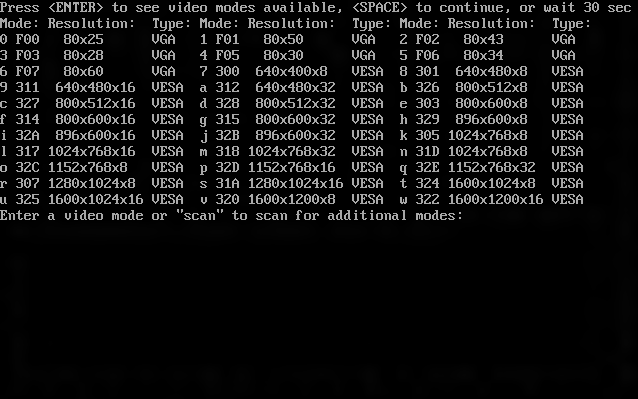
The first thing we need to do is find information about what display modes are available. To do this we boot the VM and use the options available to modify the boot parameters. Be aware that when you boot the VM the Grub screen only shows for a few seconds before the first option is booted automatically. When you see the screen below, hit the ‘a’ key to easily append options to the boot command.
When you hit ‘a’ you will be presented with the boot command to edit. Options on the command line are separated by spaces. Add a new one: vga=

Hit the enter key and the OS will boot. You will see a black screen with a number of options on it. Hit enter again at this screen in order to view the display modes available to us.

From the list of available modes, choose the one you want to use. The system is waiting for you to type in the three character hex code for the mode you wish to use. For 1024x768 at 32 bit, for example, enter 318
Assuming all works correctly you will see Android running in your chosen resolution. Sadly, it’s not permanent yet. I’ve also become paranoid enough that before I edit the bootloader options permanently I like to try what I’m going to do first.
Reboot the system and hit ‘a’ to append boot options. This time we want to specify the display option we want to use. Just to bend your head a little, the boot option needs the decimal equivalent of the hex value that the display modes screen showed us. For Our 1024x768x32, the hex was 318. The decimal is 792, so we append vga=792 to the boot options.
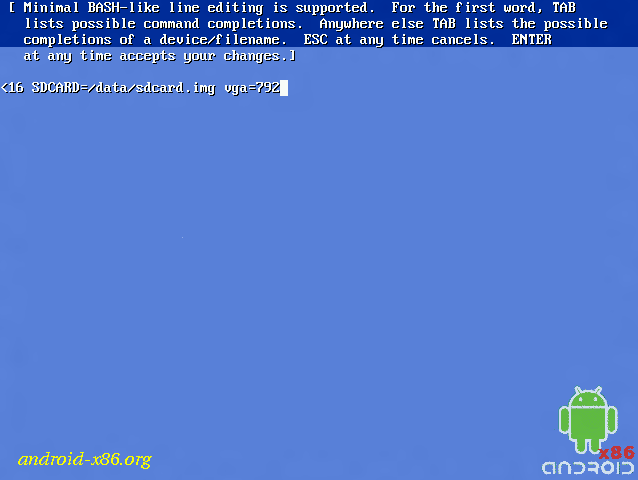
When Android boots, you should see it in 1024x768 once more:

Now we need to make the change permanent. To do that we need to edit the configuration file that the Grub bootloader uses.
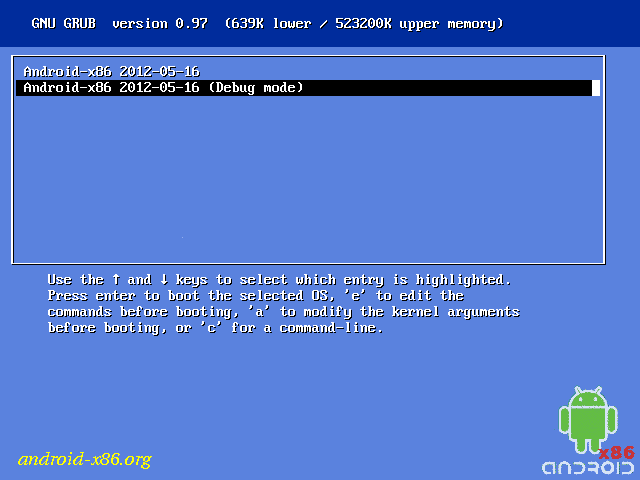
To do that we need to reboot the system in debug mode.
Boot the system and use the cursor keys to select the second option on the boot menu.
The system will boot to a command shell:

Once you’re in the command prompt, typing clear will clear the screen and get rid of the boot messages. Then you need to enter the following commands:
cd /
mount –o remount,rw /mnt
cd /mnt/grub
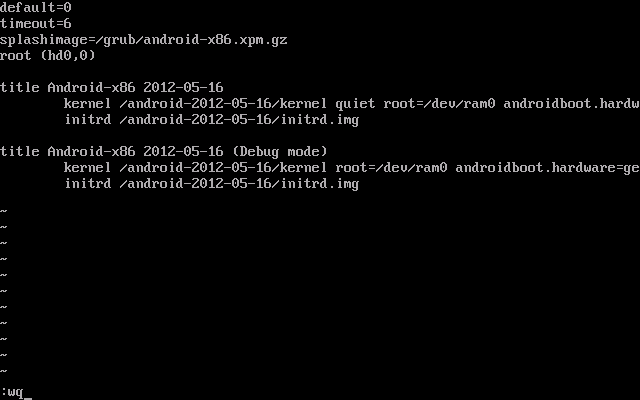
vi menu.lst
What does that lot do? The part of the filesystem that stores the bootloader is attached as read-only. The mount command effectively detaches and reattaches that part of the filesystem so we can modify it. The files we want are in the grub folder within mnt. Finally, we open the text editor Vi to change the file.
Vi is a bit arcane, although extremely powerful. For help with the commands look at online tutorials, like the one hosted by Washington University.
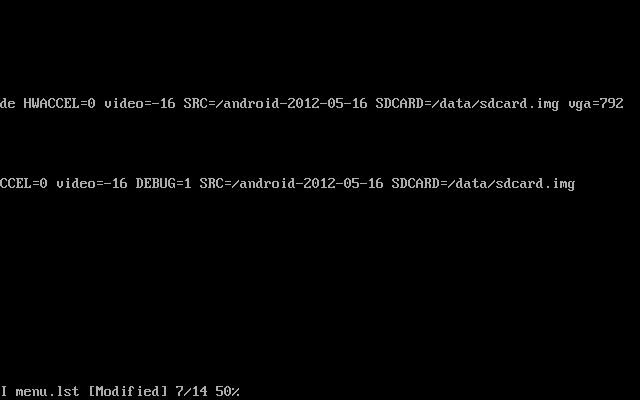
Once we’re in the config file we are going to add the vga=792 option to the end of the default boot command. I’ll tell you what Vi commands I use to get the job done – note that they are not necessarily the best ones, they just work for me. I know about half a dozen Vi commands and they allow me to get by. If I want to do something clever I have to look it up!

In Vi, the cursor keys allow you to move around the file. Pressing escape tells Vi to listen for commands. Move down to the start of the first line of the first boot section (the first occurrence of ‘kernel’). Press Esc then ‘o’. That should give you a new line after kernel.

Now use the cursor keys to navigate to the end of that first ‘kernel…’ line and you should be able to type ‘ vga=792’
Now we want to get rid of that extra line. Move the cursor to the start of it and hit Esc then dd (escape then hit ‘d’ twice).
Finally we save the file. Esc+:wq is the command to write out the file and quit.
You should now find yourself back at the command prompt. Type reboot –f to reboot the system.
You should now find that by default your Android VM boots into your chosen resolution.
A quick side note
If you don’t have control over your own DHCP server you can use the following command to poke the dns into life:
setprop net.dns1 x.x.x.x where x.x.x.x is the IP address of your DNS. You can also add a second with net.dns2.
You can also give the VM more memory with no issues – mine now runs with 1024Mb. I’ve also added a second CPU core as an experiment which works but I’m not sure it’s any quicker.