This is part 2 of a series of posts bout building a hybrid network connecting Windows Azure and on-premise. For more background on what the goals are, and for information on how to create the Azure Network and connect the VPN tunnel between on-premise and cloud see part 1.
Creating a DC on our Azure Network
I’m going to create a new VM on Azure using the VM gallery. One important point when doing this is that you should add a second drive to the VM for domain controllers. This is down to how read/write caching works on the primary drive (it’s enabled) which means there is a risk that a write operation may make it to the cache but not to the drive in the event of a failure. This would cause problems with AD synchronisation and for that reason we add a seond drive and disable caching on it so we can use it to host the AD database.
Before we create the new machine it’s a good idea to create a storage account. If we leave Azure to do it the account gets the usual random name. I prefer order and convention in these things, so I’ll create one myself.
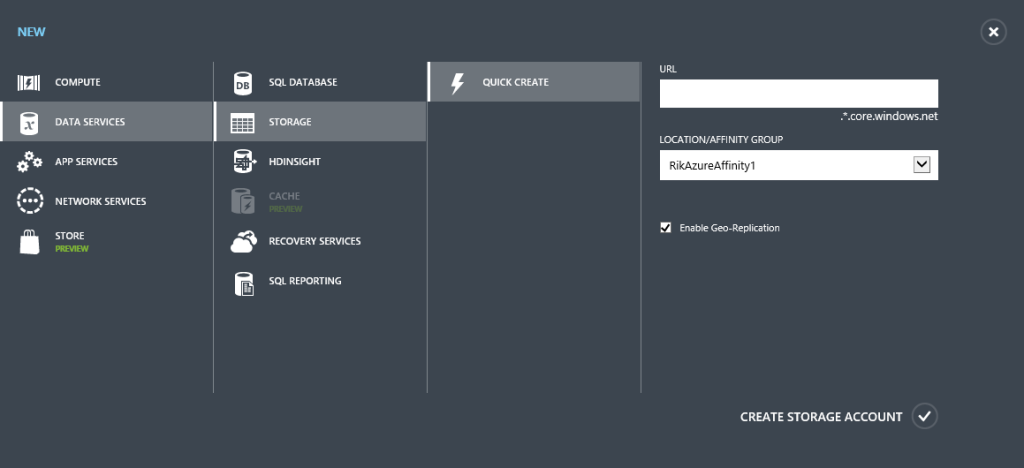
When you create a storage account, Azure now creates a container within it named vhds and it uses that to hold the virtual hard disks for your VMs.
We can now create a virtual machine using the VM Gallery.
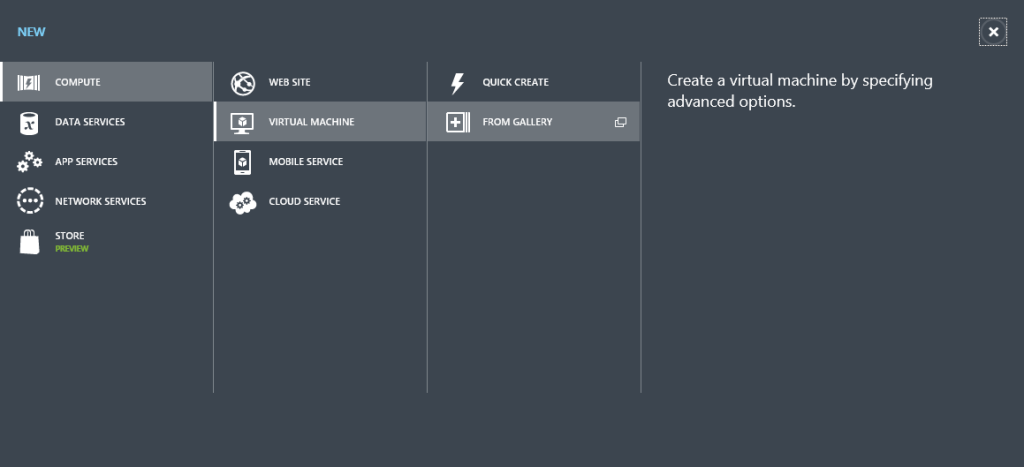
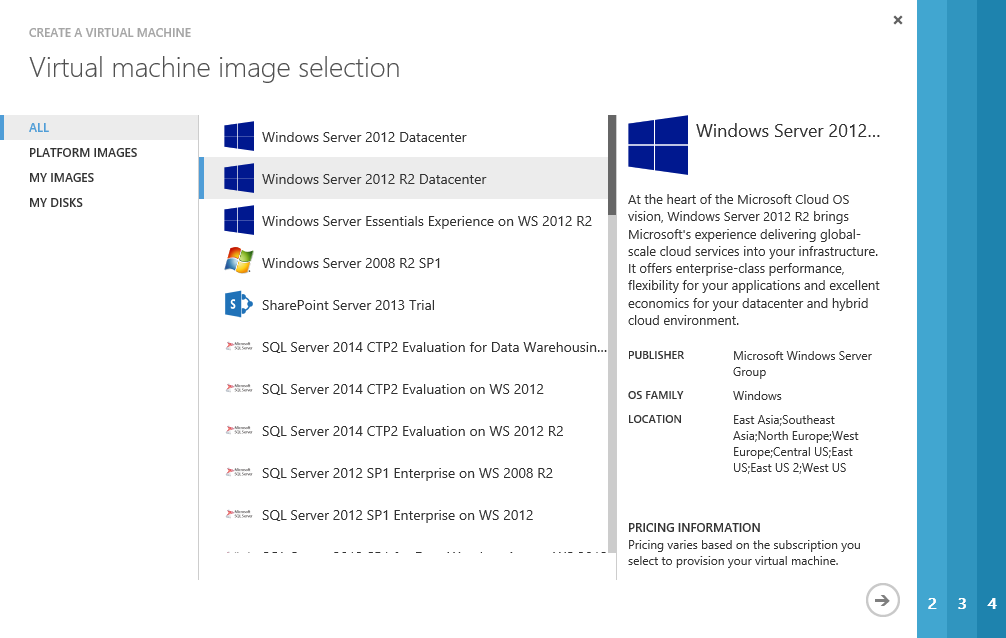
The Virtual Machine creation wizard will appear and show the numerous VM templates we can start from. I want a Server 2012 R2 DC so I’m going to choose Windows Server 2012 R2 Datacenter from the list.
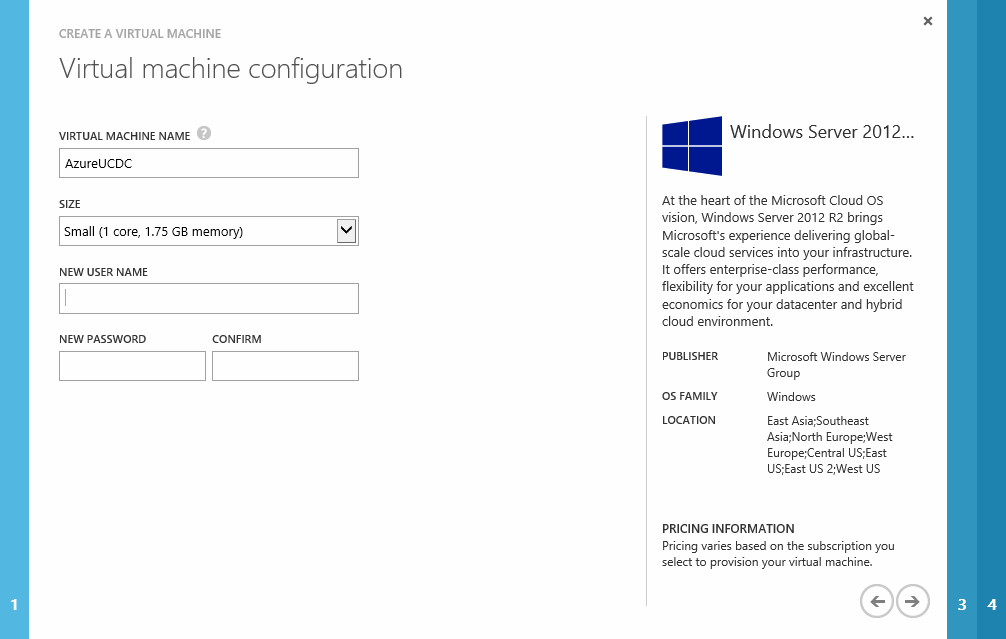
The next screen allows us to set the VM name. This is also used for the Azure Endpoint and must be unique within Azure. We can also choose a size for the VM from the available Azure VMs. This is a lab so I’m happy with a small VM. In production you would size the VM according to your AD.
We also need to provide a username and password that Azure will configure when it deploys the VM. We’ll use that to connect to the machine in order to join it to the domain.
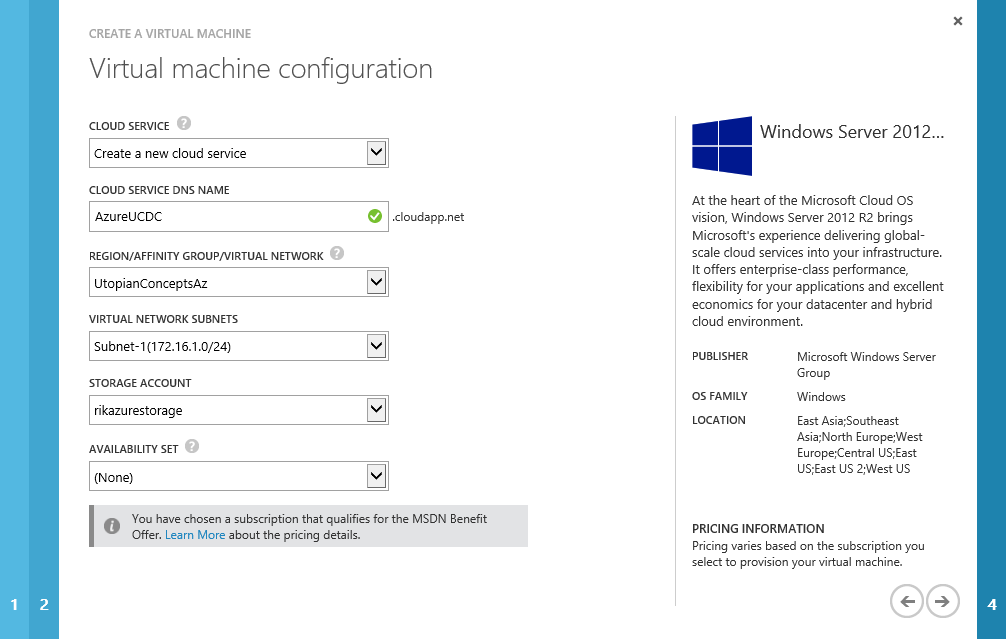
The next screen asks for a whole bunch of information about where the new VM will be placed and what networks it will be connected to. The wizard does a pretty good job of selecting the right defaults for most settings.
I created two subnets in my virtual network so I could have an internal and external subnets. The DC shouldn’t have connections from outside our network so it’s going on subnet-1.
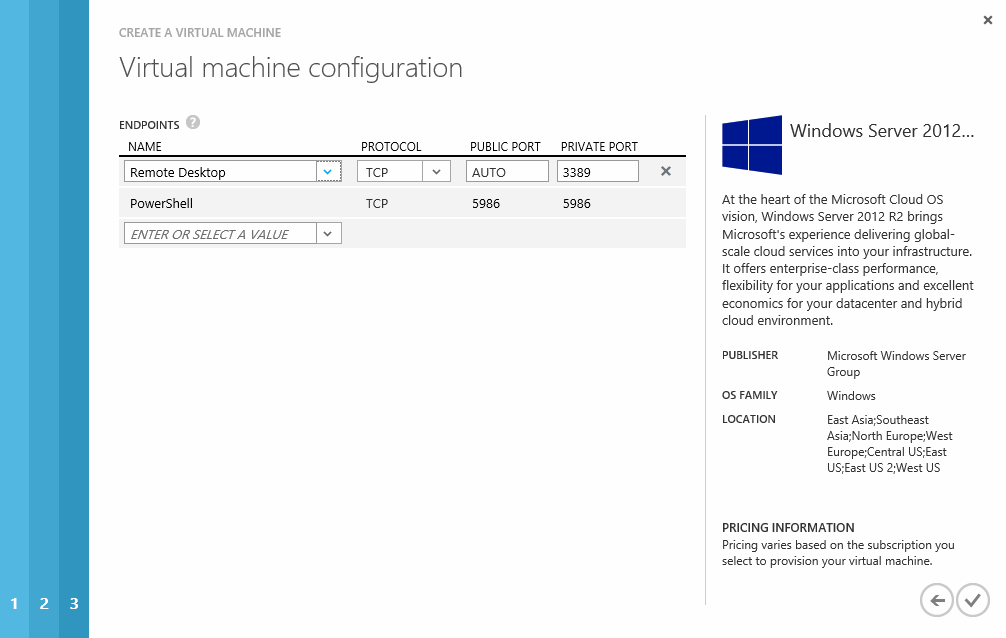
The final screen allows us to configure the ports that will be available through the Azure endpoints. If we remove these then we will only be able to connect to the new VM via our internal network. That’s exactly what I want, so I will click the big X at the right hand side of each endpoint to remove it.
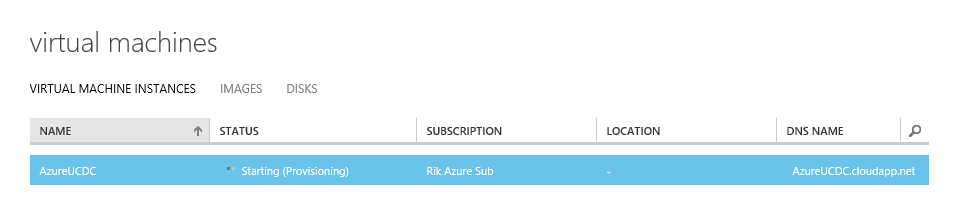
When we click the final button Azure will show us that our new VM is provisioning.
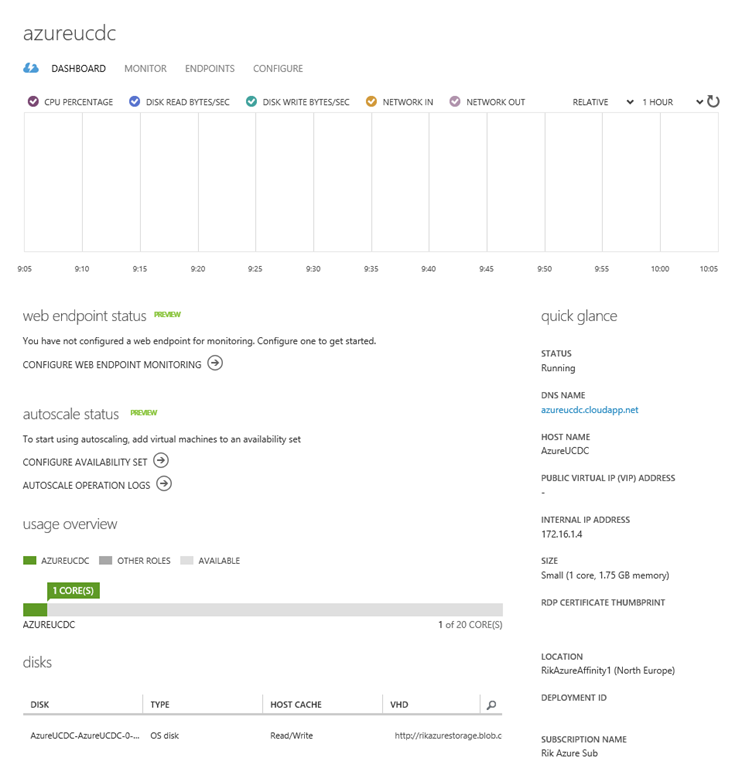
Once the VM is running you can click on it to view the dashboard. You will see from mine that the new VM has no public IP address and that it has been give an internal IP address of 172.16.1.4 – on the Azure network I created earlier. The first server that you connect to a virtual network subnet in Azure will always get .4 as it’s address; the second gets .5, etc. An important point to note here is that if a virtual machine is deallocated (when you shut it down from the Azure portal it will do this) the DHCP-given IP address is released and another server could get that address. It’s important to be careful about the order you start machines in for this reason.
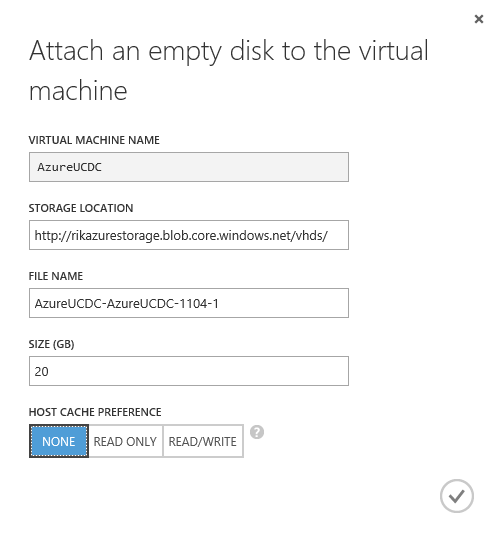
I haven’t added a second hard disk to the VM, so that’s our next step. At the bottom of the dashboard there is an Attach button that allows us to add an empty disk to the VM.

In the screen that appears we can give our new disk a name and size and, importantly, set the type of caching we want on the disk. As I mentioned, everything I have read and heard tells me that caching on the disk holding the AD database should be turned off.
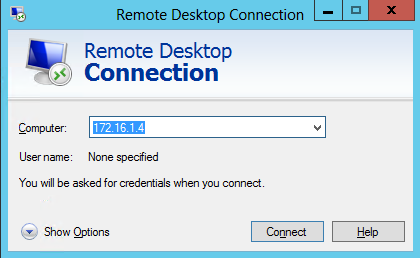
Now we’ve got the second disk attached, the next step is to make an RDP connection to our new server. We can do that from one of the machines on our on-premise network just by entering the ip address of the Azure-hosted server into the Remote Connection dialog.
Remember to use the credentials you set when you created the VM: e.g. azureucdc\builduser
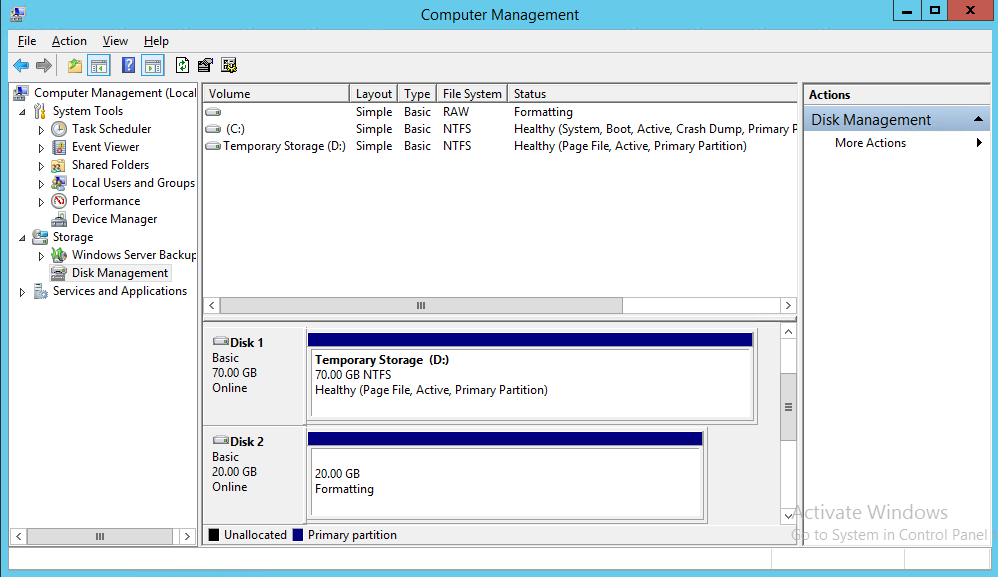
The first thing we need to do is bring the additional disk online, create a volume and assign a drive letter. I’ve used S for sysvol.
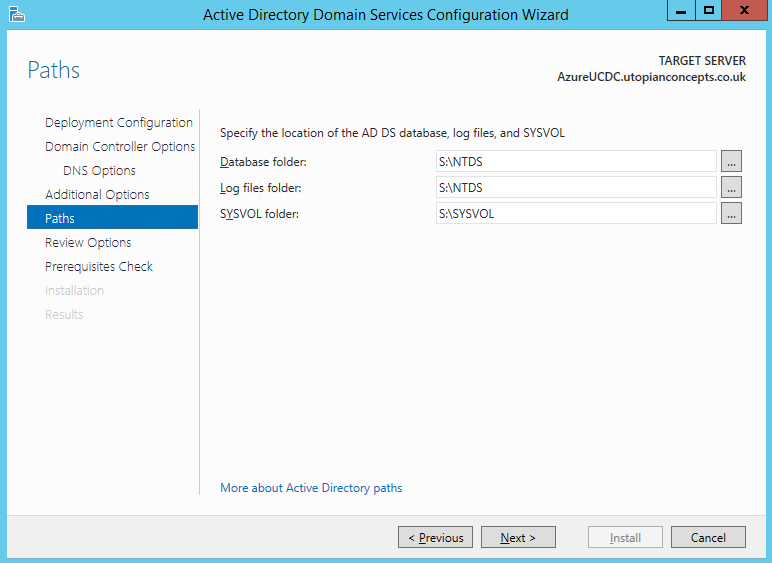
Next, we need to join the server to our AD domain, which will need a reboot. After that we can add the Active Directory Domain Services role in order to promote the server to be a domain controller. It’s important when doing this to set the paths for the AD databases to the second drive (S in my case)
Once we’ve got our new DC and DNS up and running, we should configure our Azure network so it knows the IP address of our new DNS and hands it to other servers in our network.
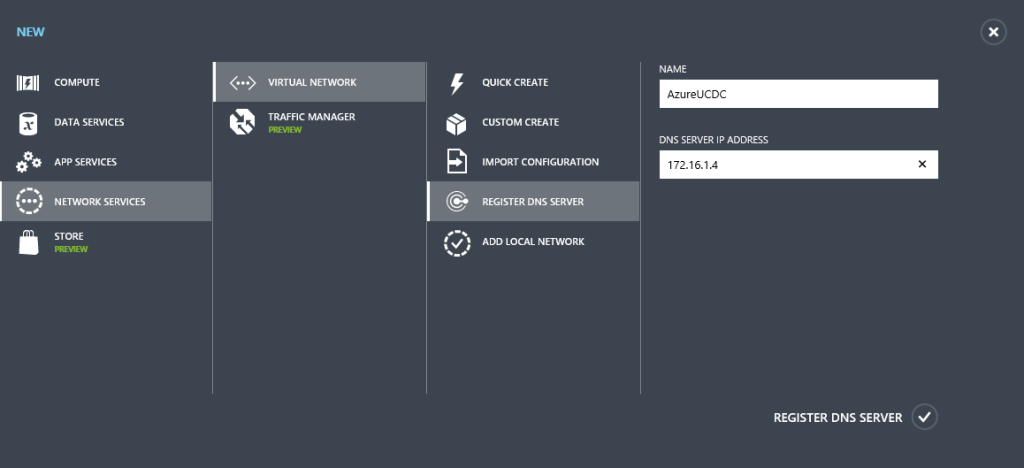
To do that we register the DNS with Azure first.
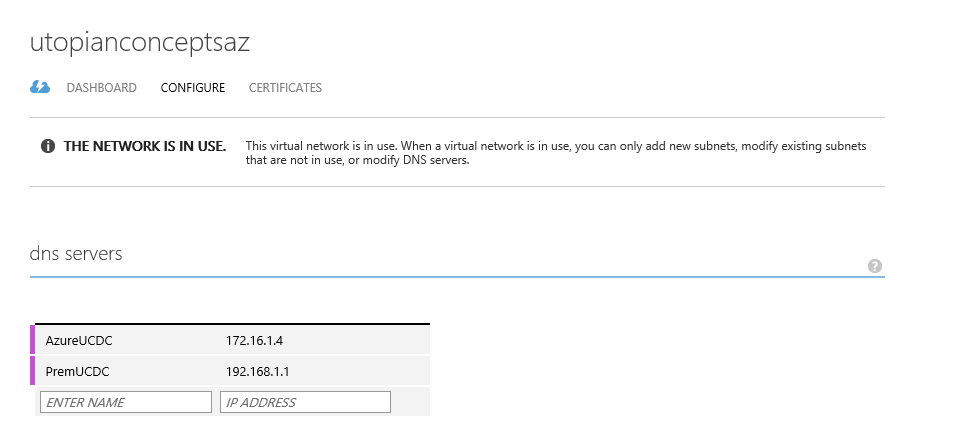
Next we modify the configuration of our Azure virtual network to add the new DNS. The DNS addresses are handed out in the order they are specified in the Azure network, so I’ve removed the on-premise DNS then added first the one hosted in Azure and then the on-premise one.
We now have a functioning Azure network with services that will support any other machines we host there even if the VPN link goes down.
We’ll need some more VMs for our other services to support our connected Azure ADFS. We’ll deal with those in part 3.