I have spent a good deal of time over the last month or two building an Azure Resource Template to deploy a relatively complicated IaaS environment. In doing so I’ve hit a variety of problems along the way and I though that a number of blog posts were in order to share what I’ve learned. I will write a detailed post on certain specific servers within the environment shortly. This post will describe Azure Resource Template basics, problems I hit and some decisions I made to overcome issues. Further posts will detail my environment and specific solutions to creating my configuration.
Tooling
- I started this project using Visual Studio 2013 and the Azure 2.5 .Net SDK. I am now using Visual Studio 2015 and the 2.7 SDK. The SDK is the key – the tooling has improved dramatically, although there are still things it doesn’t do that I would like it to (like proper error checking, for a start). You can find the SDKs on the Azure Downloads site.
- You will also need the latest Azure PowerShell module. It’s important to keep the SDK and PowerShell current. There is a big change coming in the PowerShell soon when the current situation of switching between service management commands and resource management commands will be removed.
- Debugging templates is extremely hard. It’s impossible without using Azure Resource Manager (https://resources.azure.com). This is a fantastic tool and you absolutely need to use it.
Documentation
- The Azure Resource Template documentation is growing steadily and should be your first point of reference to see how things are done.
- The Azure Quickstart Templates are a great source of inspiration and code if you are starting out. You need to be careful though – some of the samples I started with were clunky and a couple plain didn’t work. More importantly, they don’t necessarily reflect changes in the API. Adding resources should always be done through the tooling (more on that in a bit). If you just want to leap straight to the source code, it’s on GitHub.
Getting Started With Your Deployment Project
Creating a new deployment project is pretty straightforward. In the New Project dialog in Visual Studio you will find the Azure Resource Group project type under Cloud within Visual C#.
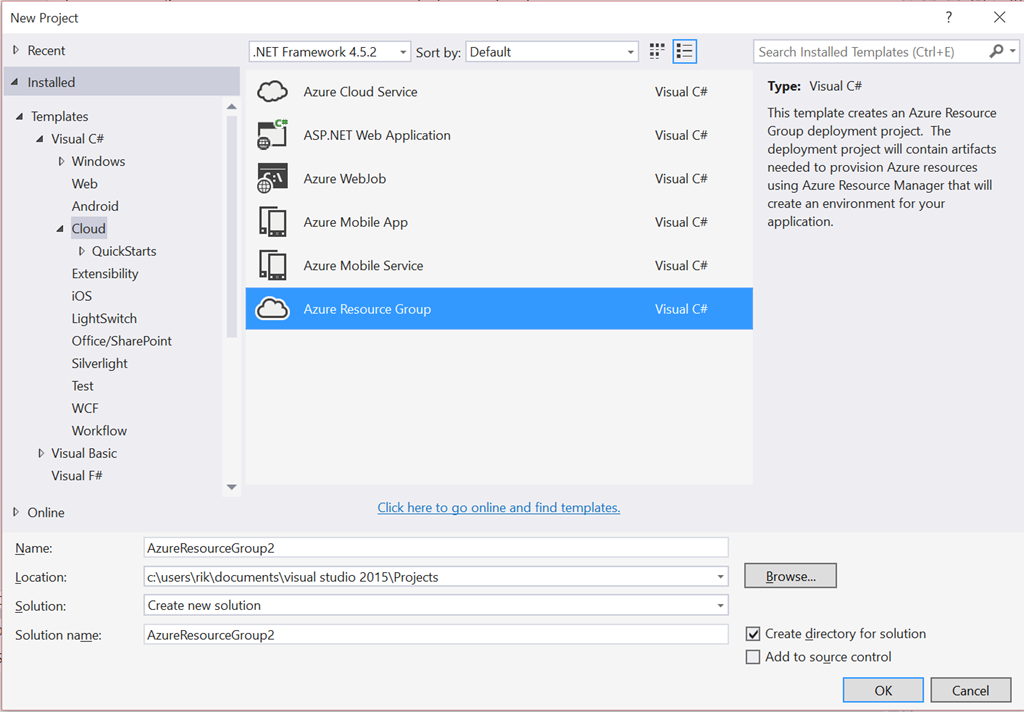
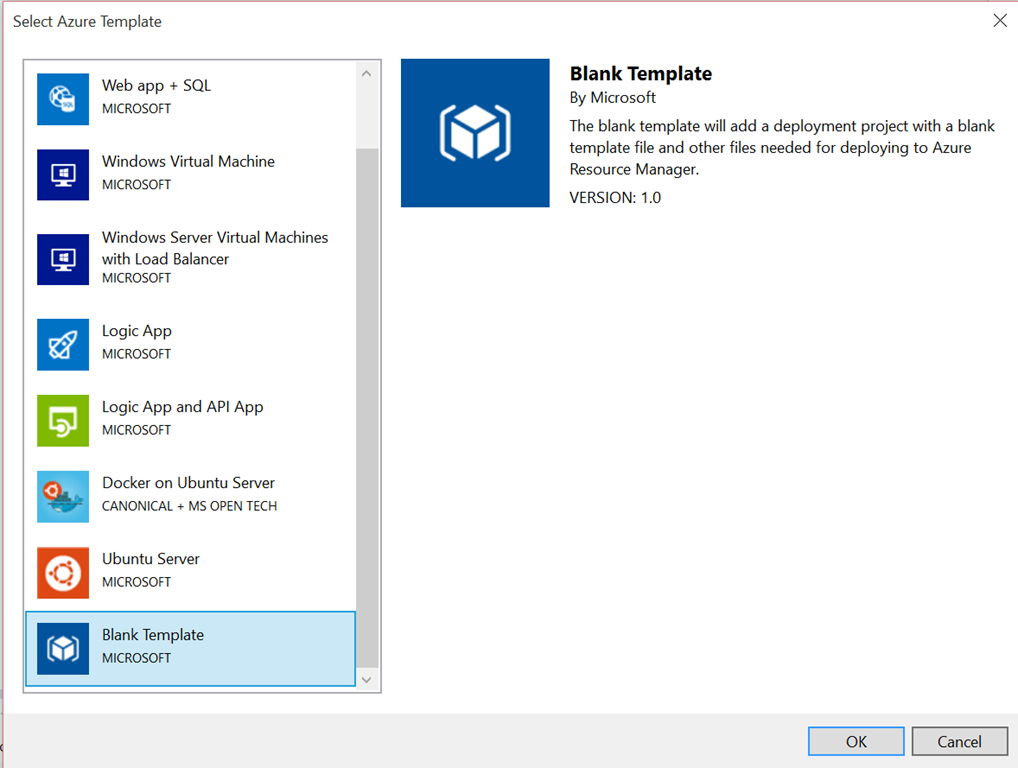
When you create a new Azure Resource Group project, the tooling helpfully connects to Azure to offer you a bunch of starting templates. If you want something that’s on the list, simply choose it and your template will be created pre-populated. If you want to start clean, as I normally do, choose Blank Template from the bottom of the list.
The new project contains a small number of files. My advice is to ignore the Deploy-AzureResourceGroup.ps1 script. It contains some useful snippets, but only works if you run it in a very specific way. The ones you care about are the DeploymentTemplate.json and DeploymentTemplate.param.dev.json files.
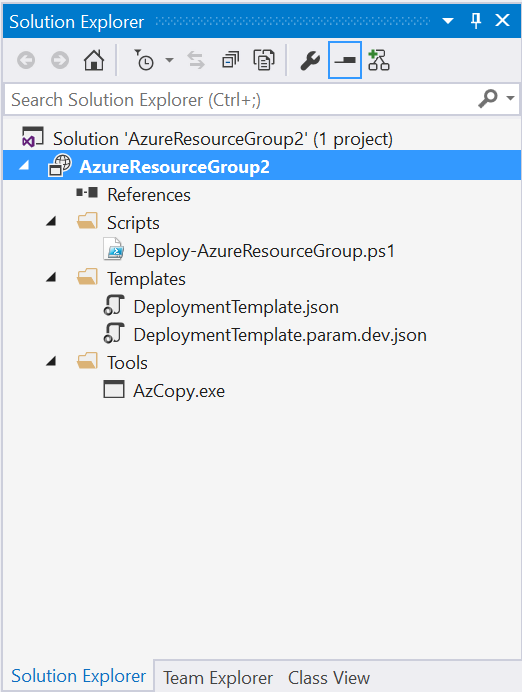
The DeploymentTemplate.json is (oddly) your template file where you detail your resources and stuff. The .param.dev.json file is a companion parameter file for the template, for when you want to run the deployment (more on that later).
If you open the deployment template you will see the new JSON Outline window appear.
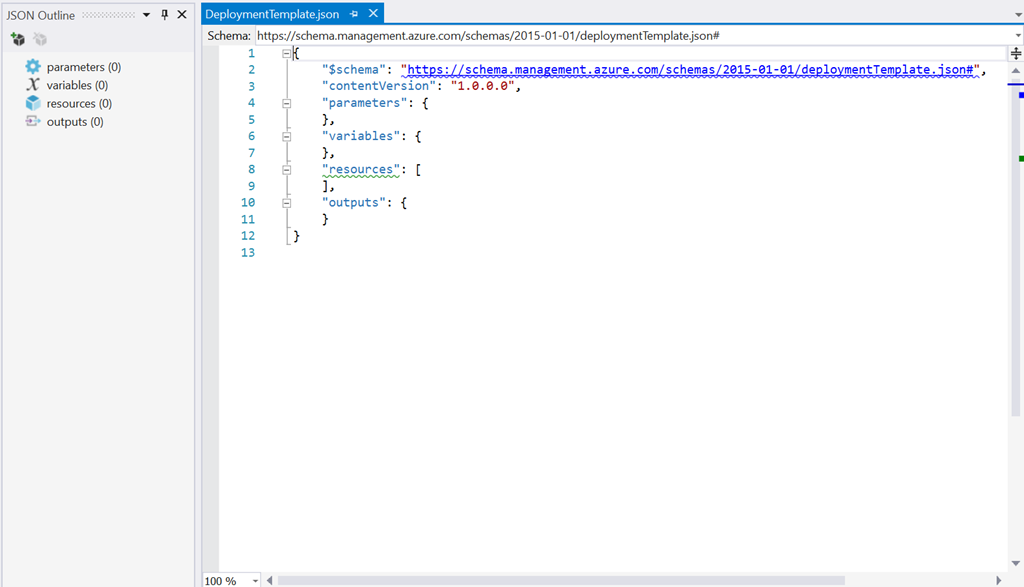
I’ll come onto the contents of the template in a moment. For now let’s focus on the JSON Outline. It’s your friend for moving around your template, adding and remove resources. To add a new resource, click the little package icon with a plus on it, top left of the window.
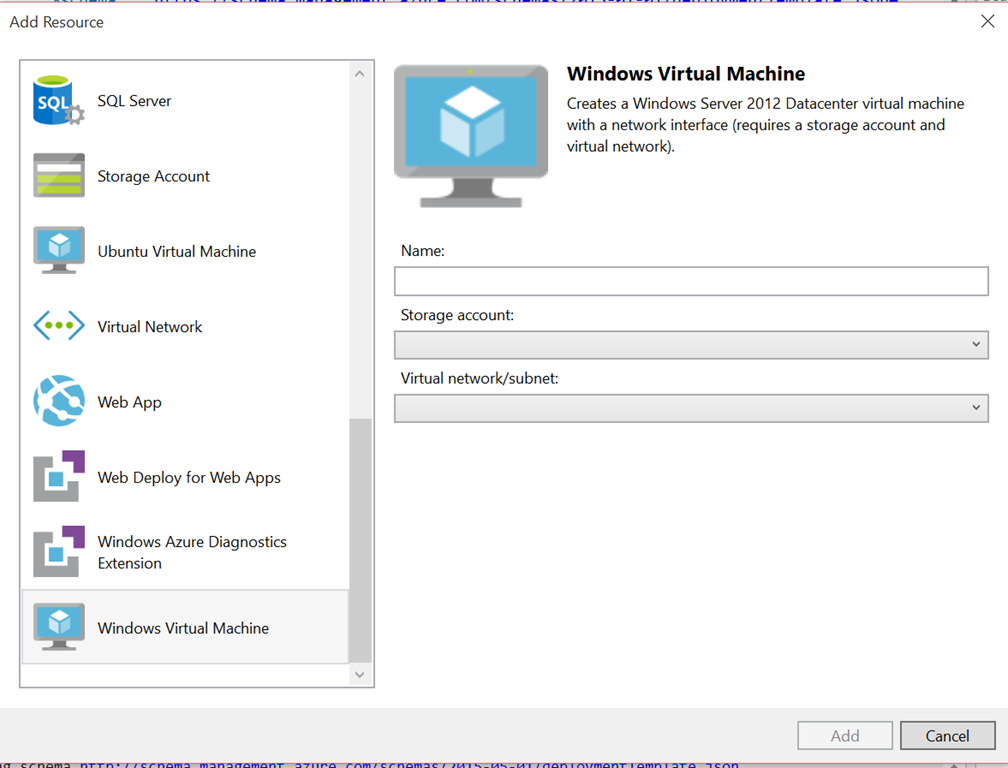
When you click the icon, the tooling talks to Azure to get the latest versions of resources. The tooling here is intelligent. In the screenshot above you can see I’m adding a Virtual Machine. As a resource, this depends on things like a storage account (to hold the hard drive blobs) and a network. If you already have these defined in your template, they will be listed in the dropdowns. If not, or if you don’t want to use them, you can add new resources and the tooling will step you through answering the questions necessary to specify your resources.
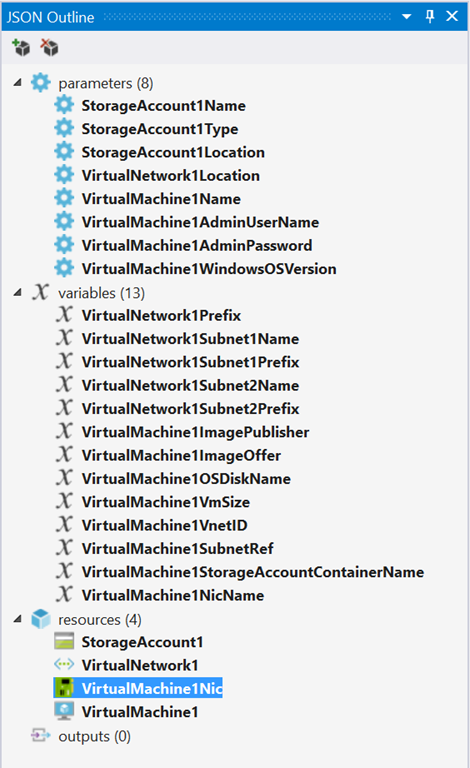
The image below shows the JSON outline after I’ve added a new VM, plus the required storage and network resources. You can see that the tooling has added parameters and variables into the template as well.
You can build your template using only the tooling if you like. However, if you want to do something complex or clever you’re going to be hacking this around by hand.
A Few Template Fundamentals
There are a few key points that you need to know about templates and the resources they contain:
-
There is a one to one relationship between a template and a deployment. If you look in the Azure Portal at a Resource Group you will see Last Deployment listed in the Essentials panel at the top of the blade.
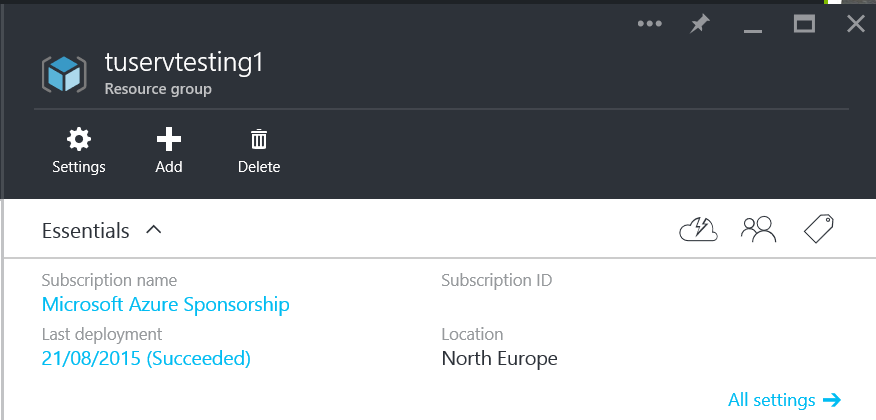
resource blade essentials Clicking the link will show the deployments themselves. The history of deployments is kept for a resource group and each deployment can be inspected to see what parameters were specified and what was done.
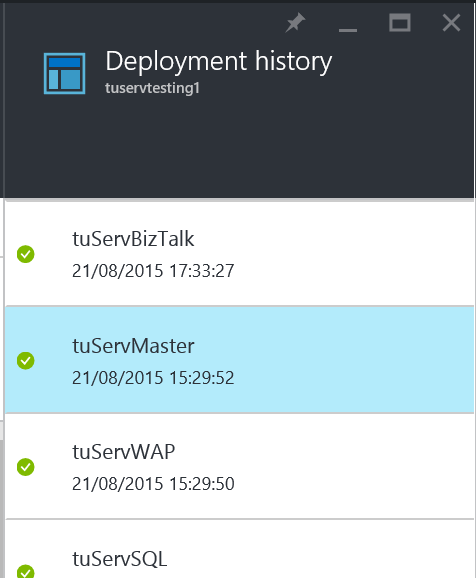
deployment history 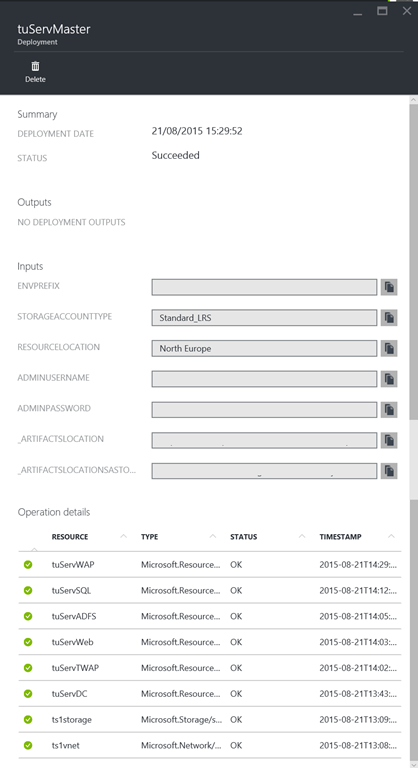
deployment details -
A resource in a template can be specified as being dependent on another resource in the same template. I have tried external dependencies – the templates fail. This is important because you have no control of the execution order of a template other than through dependencies. If you don’t specify any, Azure Resource Manager will try to deploy all the resources in parallel. This is actually a good thing – in the old world of Azure PowerShell it was hard to push out multiple resources in parallel. When you upload a template for deployment, Azure Resource Manager will parse it and work out the deployment order based on the dependencies you prescribe. This means that most deployments will be quicker in the new model.
-
Resources in a template must have unique names. You can only have one resource of a given type with a given name. This is important and has implications for how you achieve certain things.
-
You can nest deployments. What does that mean? You can call a template from another template, passing in parameters. This is really useful. It’s important to remember that template-deployment relationship. If you do nest these things, you’ll see multiple deployments in your Resource Group blade – one per template.
-
If a resource already exists then you can reconfigure it through your template. I’ve not tried this on anything other than a virtual network, but templates define the desired configuration and Azure Resource Manager will try to set it, even it that means changing what’s there already. That’s actually really useful. It means that we can use a nested deployment in our template to reconfigure something part way through our overall deployment.
-
Everything is case-sensitive. This one just keeps on biting me, because I’m a crap typist and the tooling isn’t great at telling me I’ve mistyped something. There’s no IntelliSense in templates yet.
Deploying Your Template to Azure
Right now, deploying your template means using PowerShell to execute the deployment. The New-AzureResourceGroup cmdlet will create a new Resource Group in your subscription. You tell it the name and location of the resource group, the deployment template you want to use, and the values for the template parameters. That last bit can be done in three different ways – take your pick:
- Using the –TemplateParameterFile switch allows you to specify a JSON-format parameters file that provides the required values.
- PowerShell allows you to specify the parameters as options on the command. For example, if I have a parameter of AdminUsername in my template I can add the –AdminUsername switch to the command and set my value.
- You can create an array of the parameters and their values and pass it into the command. Go read up on PowerShell splatting to find out more about this.
Being old, my preference is to use the second option – it means I don’t need to keep updating a parameters file and I can read the command I’m executing more easily. PowerShell ninjas would doubtless prefer choice number three!
The code below shows how I deploy my resource template:
$ResourceGroupName = "tuservtesting1"
$ResourceGroupLocation = "North Europe"
$TemplateFile = "$pwd\\DeploymentTemplate.json"
$envPrefix = "myenv" $adminUsername = "env-admin"
$adminPassword = "MyPassword"
$adminPassword = ConvertTo-SecureString $adminPassword -AsPlainText -Force
$resourceLocation = "North Europe"
$storageAccountType = "Standard\_LRS"
$artifactsLocation = "http://mystorage.blob.core.windows.net/templates"
# create a new resource group and deploy our template to it, with our params
New-AzureResourceGroup -Name $ResourceGroupName `
-Location $ResourceGroupLocation `
-TemplateFile $TemplateFile `
-storageAccountType $storageAccountType `
-resourceLocation $resourceLocation `
-adminUsername $adminUsername `
-adminPassword $adminPassword `
-envPrefix $envPrefix `
-_artifactsLocation $ArtifactsLocation `
-artifactsLocationSasToken $ArtifactsLocationSasToken `
-Force -Verbose
I like this approach because I can create scripts that can be used by our TFS Build and Release Management systems that can automatically deploy my environments.
Stuff I’ve Found Out The Hard Way
The environment I’m deploying is complex. If has multiple virtual machines on a shared network. Some of those machines have public IP addresses; most don’t. I need a domain controller, ADFs server and Web Application Proxy (WAP) server and each of those depends on the other, and I need to get files between them. My original template was many hundreds of lines, nearly a hundred variables and half a dozen parameters. It tool over an hour to deploy (if it did) and testing was a nightmare. As a result, I’ve refined my approach to improve readability, testability and deployability:
- Virtual machine extension resources seem to deploy more reliably if they are within the Virtual Machine markup. No, I don’t know why. You can specify VM extensions at the same level in the template as your Virtual Machines themselves. However, you can choose to declare them in the resources section of the VM itself. My experience is that the latter reliably deploys the VM and extensions. Before I did this I would get random deployment failures of the extensions.
- Moving the VMs into nested deployments helps readability, testability and reliability. Again, I don’t know why, but my experience is that very large templates suffer random deployment failures. Pulling each VM and it’s linked resources has completely eliminated random failures. I now have a ‘master template’ which creates the core resources (storage account and virtual network in my case) and then nested templates for each VM that contain the VM, the NIC, the VM extensions and, if exposed to the outside world, load balancer and public IP.
There are pros and cons to this approach. Reliability is a huge pro, with readability a close second – there are far fewer resources and variables to parse. I can also work on a single VM at once, removing the VM from the resource group and re-running the deployment for just that machines – that’s saved me so much time! On the con side, I can’t make resources in one nested deployment depend on those in another. That means I end up deploying my VMs much more in sequence than I necessarily would have otherwise because I can only have one nested deployment depend on another. I can’t get clever and deploy the VMs in parallel but have individual extensions depend on each other to ensure my configuration works. The other con is I have many more files to upload to Azure storage so the deployment can access them – the PowerShell won’t bundle up all the files that are part of a deployment and push them up as a package. - Even if you find something useful in a quickstart template, add the resources cleanly through the tooling and then modify. The API moves forwards and a good chunk of the code in the templates is out of date.
- The JSON tooling doesn’t do much error checking Copy and paste is your friend to make sure things like variable names match.
- The only way to test this stuff is to deploy it. When the template is uploaded to Azure, Resource Manager parses it for validity before executing the deployment. That’s the only reliable way to check the validity of the template.
- The only way to see what’s happening with any detail is to use Azure Resource Explorer. With a VM, for example, you can see an InstanceView that shows the current output from the deployment and extensions. I’ll talk more about this when I start documenting each of the VMs in my environment and how I got them working.